Microsoft Outlook add-ins will enhance the efficiency of using the application, such as improving productivity, management, collaboration and helping you perform daily tasks more easily. And adding and removing add-ins in Outlook is also necessary, especially those utilities that cause problems for Outlook or are no longer used. Below are instructions for installing and removing add-ins in Outlook.
Instructions for installing add-ins in Outlook
Install add-ons in older versions of Outlook
Step 1:
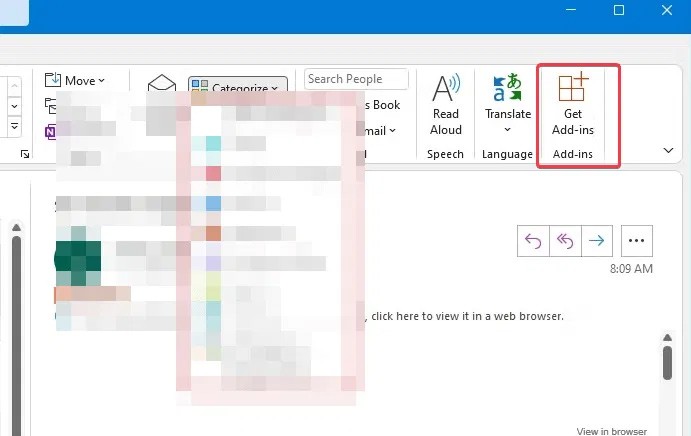
In the ribbon, navigate to Home > Get Add-ins as shown below. Then find the add-on you want to install and click Get .
Step 2:
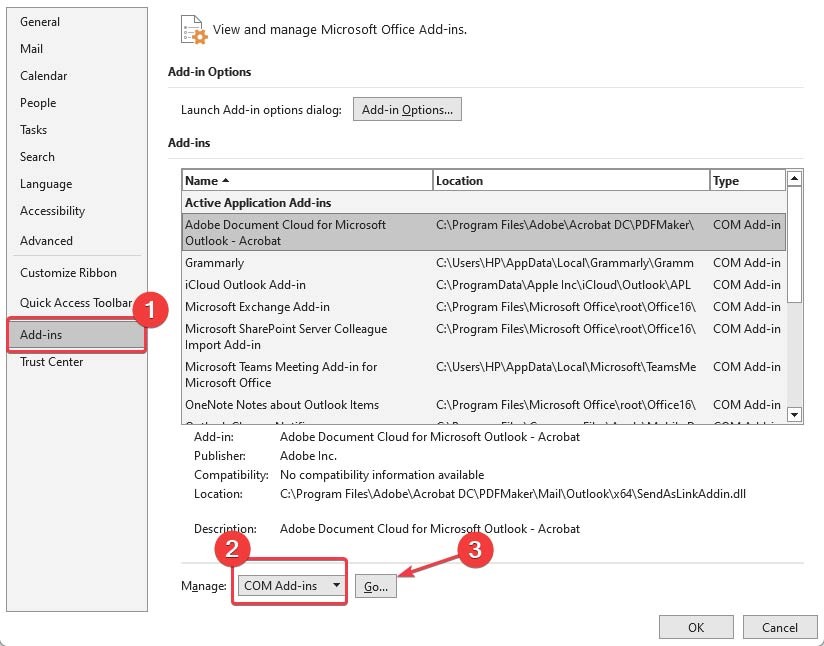
After installation, go to File > Options > Add-ins . Next, select COM Add-ins and click Go .
Locate the newly added extension and check the box next to it to enable it manually.
Install add-ins for new Outlook
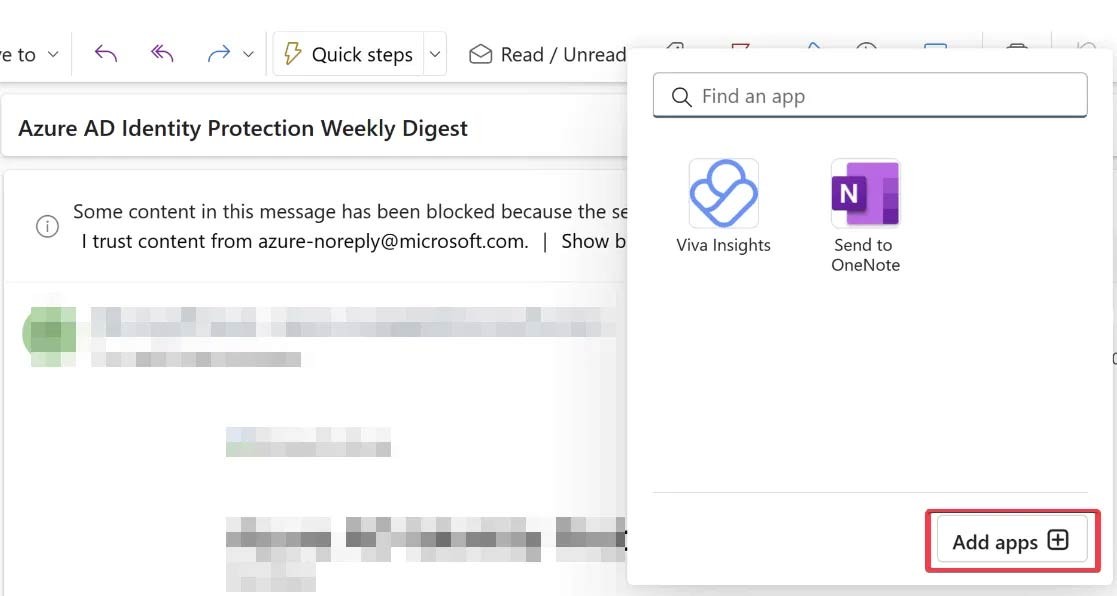
We click the Add Apps button on the Actions bar, then click Add Apps in the prompt to redirect to AppSource or Office Store. Here, find the add-in you want to install .
Click Add to install the add-in in Outlook.
Instructions for removing add-ins in Outlook
Remove add-ons from Outlook Classic
Go to File > Options > Add-Ins to open the Options menu. Here, you will see all the installed add-ins. Select Go and then uncheck the add-in or click on it and select Remove.
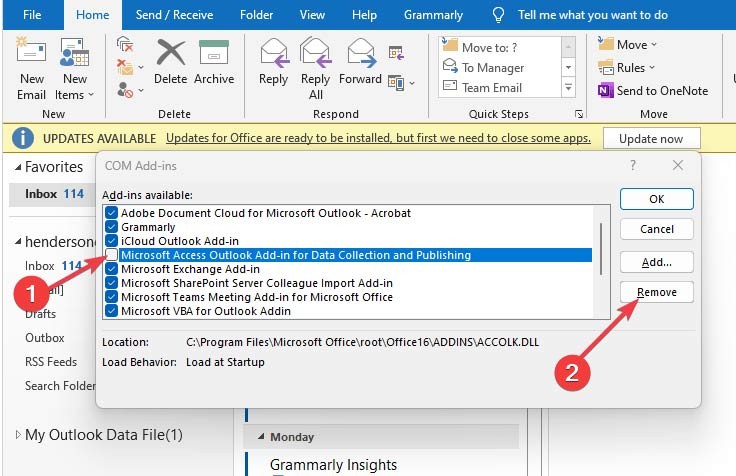
Uninstall add-ins from new Outlook
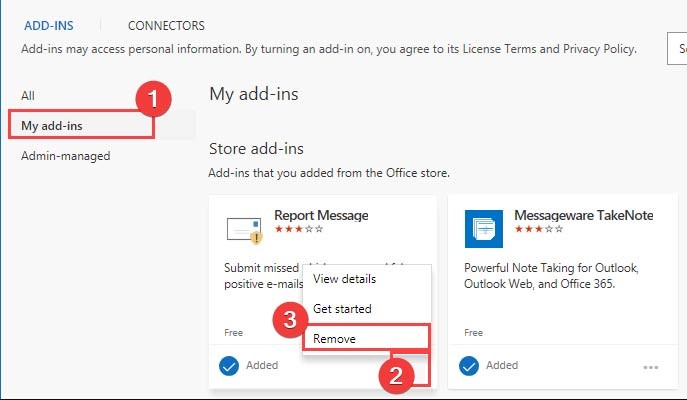
To remove an add-in on the new Outlook, navigate to Apps > Add apps > Manage and then tap the 3-dot icon on the add-in you want to remove, select Remove.
