Comment récupérer laccès au disque dur, corriger lerreur dimpossibilité douvrir le disque dur
Dans cet article, nous vous expliquerons comment récupérer l'accès à votre disque dur en cas de panne. Suivez-nous !
Realtek HD Audio Manager is one of the most popular and useful software that Windows users have on their PCs. HD Audio Manager is essentially the GUI end of the Realtek HD Audio Driver, the default audio driver for most PC sound cards (including those integrated into motherboards ). It is usually installed on the PC, but users cannot even find it using the Windows search tool.
So how to find Realtek HD Audio Manager, as well as how to update and reinstall Realtek drivers? Today's article will give you answers to these questions.
Where is Realtek HD Audio Manager located?
Before tweaking Realtek HD Audio Manager, users need to actually know where it is located. The default installation directory for Realtek should be “C:\Program Files\Realtek\Audio\HDA”. Here, users will find a large number of seemingly executable (.exe) files, but the really important file is “RtkNGUI64”. Double-clicking this file will open Realtek HD Audio Manager.
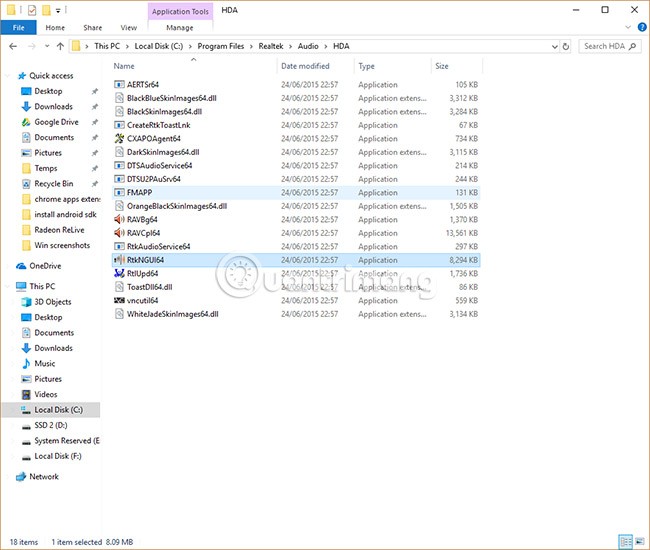
Users can make various adjustments here to their audio settings. For example, click the cog icon, then Options, and users can enable a handy feature that creates two separate audio devices that output sound simultaneously — useful if users want to use speakers to listen to game audio while chatting with someone on a headset.
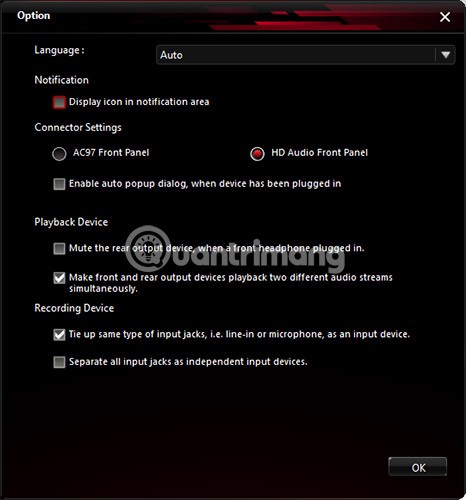
Another useful option is “Display icon in notification area” , which allows users to access HD Audio Manager from the notification area instead of the well-hidden folder mentioned above.
Also, click the gear icon, then select “About”, to see the driver version introduction. This information is important if you want to install the Realtek driver manually.
How to update Realtek HD Audio driver
Updating Realtek HD Audio Manager is simple. Click the Start button, then type " device manager" and click Device Manager when it appears.
Next, click on the arrow next to Audio inputs and outputs to display the list of audio devices. Users will see the line “Speakers (Realtek High Definition Audio)” . Right-click on this and select “ Update driver ” .
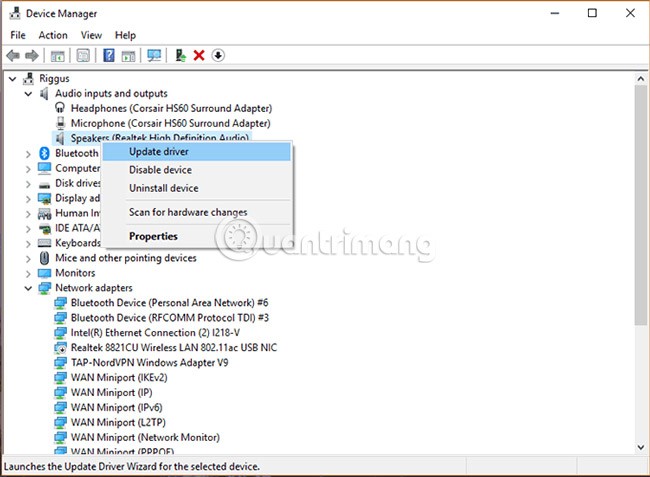
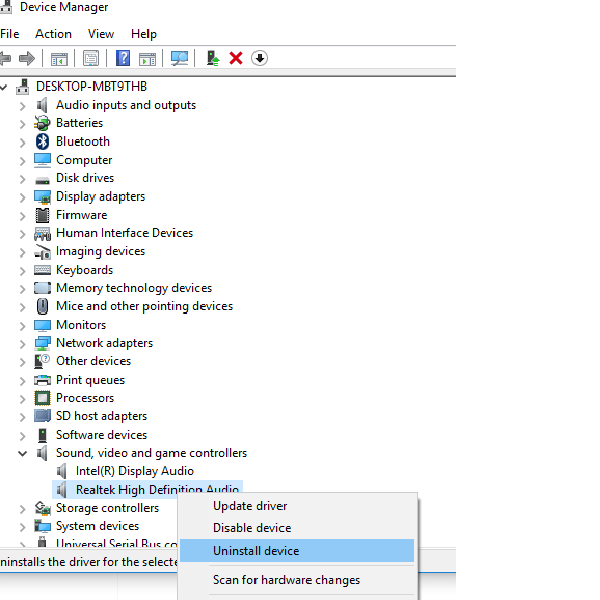
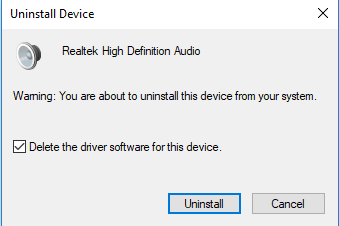
To reinstall the driver, right-click on Device Manager, select “Uninstall device” , then restart your PC.
If Realtek updates, that's good news, but if another message says the latest driver isn't always the best version, the user can choose a different version of the driver. Or sometimes the latest drivers provided by the motherboard aren't the latest drivers available, and the user may be missing out on the best sound quality.
Update Realtek HD Audio Driver Manually
To update Realtek HD Audio Driver manually, users should visit this page , which regularly provides links to the latest Realtek Audio drivers in the Microsoft Catalog.
The actual drivers from the Microsoft Catalog come in the form of CAB files. After downloading the CAB file, users need to use an unpacking tool like 7-Zip or WinRAR to extract the CAB file to their own folder.
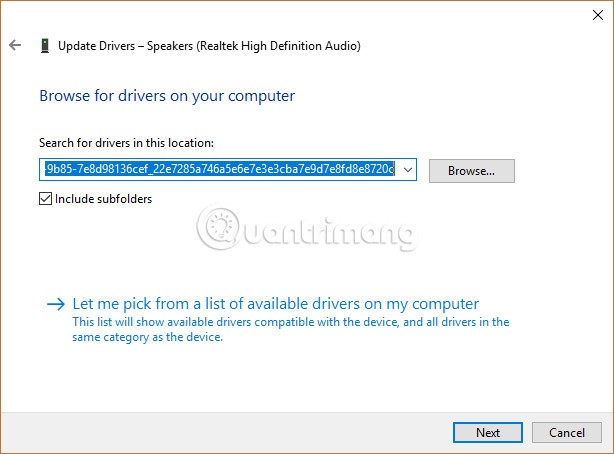
After extracting the file, go back to Device Manager, right-click on the Realtek High Definition Audio driver and click “Update driver”.
Then, click on “Browse my computer for driver software” . On the next screen, click on “Let me pick from a list of available drivers” .
Click “ Have Disk”, “Browse” , then go to the extracted CAB folder and select the first file “.inf” from there.
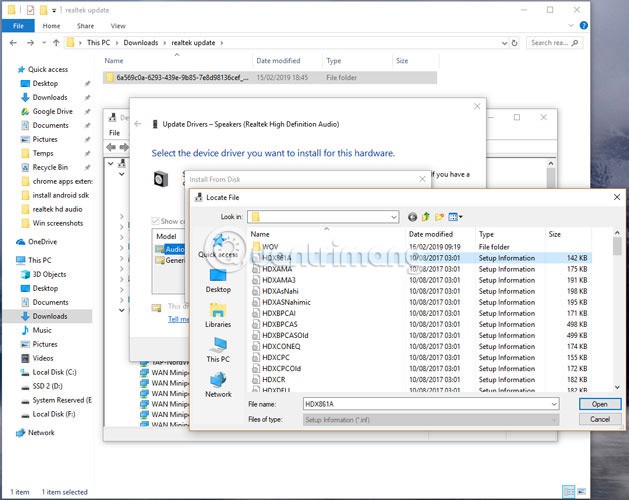
Once done, click OK and the driver will be installed.
The above steps will help users speed up the operations of Realtek HD Audio Manager and its drivers. It is worth remembering that Windows generally does a good job of updating and matching the right audio drivers for your PC, so if you are satisfied with your sound quality or feel no problems, there is no need to go through the complicated steps above.
Download and reinstall Realtek HD Audio Manager
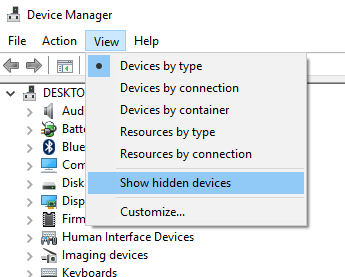
Before downloading the new driver, uninstall all current drivers. To avoid conflicts due to duplication between several drivers, users must also uninstall duplicate audio drivers.
To do this, follow these steps:
To download the audio driver manually, navigate to the official Realtek website . Click on High Definition Audio Codecs (Software) .
The download page will list the audio drivers available for download. Search for the one you want and download it to your computer.
Once the download is complete, double-click the setup file and follow the instructions to complete the installation.
If you've reinstalled Realtek HD Audio, but you still find the component missing or have difficulty opening it, follow the suggestions in the following section.
Troubleshoot Realtek HD Audio Manager issues
1. Disable Microsoft UAA Bus Driver for HD Audio and fix driver conflicts
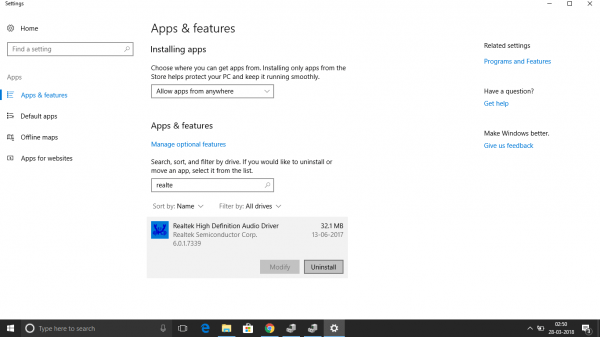
Once this is done, reinstall the Realtek HD audio driver.
2. Enable startup in Task Manager
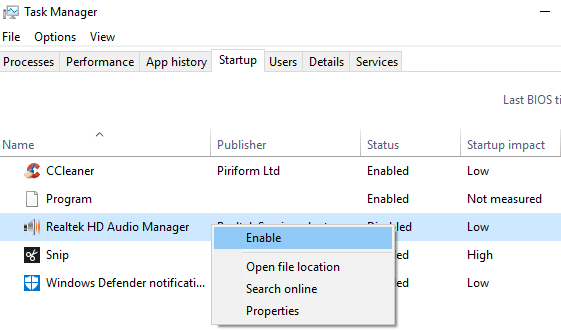
3. Update audio driver software
If Realtek HD Audio is still missing, follow the instructions in the section above to update the driver.
4. Use the Add legacy hardware option
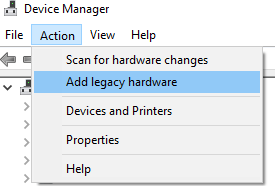
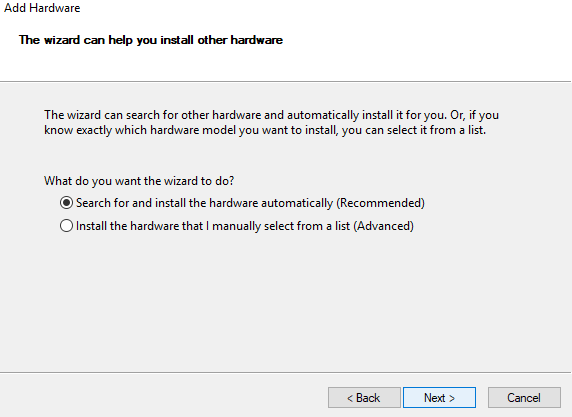
Good luck!
Dans cet article, nous vous expliquerons comment récupérer l'accès à votre disque dur en cas de panne. Suivez-nous !
À première vue, les AirPods ressemblent à n'importe quel autre écouteur sans fil. Mais tout a changé avec la découverte de quelques fonctionnalités peu connues.
Apple a présenté iOS 26 – une mise à jour majeure avec un tout nouveau design en verre dépoli, des expériences plus intelligentes et des améliorations des applications familières.
Craving for snacks but afraid of gaining weight? Dont worry, lets explore together many types of weight loss snacks that are high in fiber, low in calories without making you try to starve yourself.
Rest and recovery are not the same thing. Do you really need rest days when you schedule a workout? Lets find out!
Les étudiants ont besoin d'un ordinateur portable spécifique pour leurs études. Il doit être non seulement suffisamment puissant pour être performant dans la filière choisie, mais aussi suffisamment compact et léger pour être transporté toute la journée.
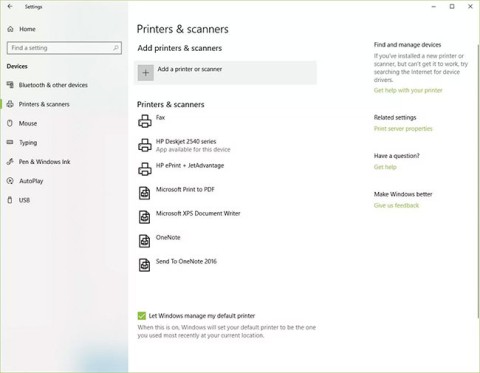
L'ajout d'une imprimante à Windows 10 est simple, bien que le processus pour les appareils filaires soit différent de celui pour les appareils sans fil.
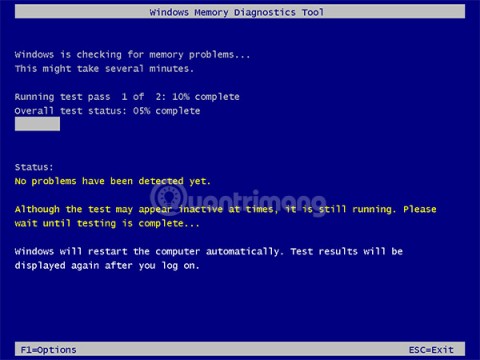
Comme vous le savez, la RAM est un composant matériel essentiel d'un ordinateur. Elle sert de mémoire pour le traitement des données et détermine la vitesse d'un ordinateur portable ou de bureau. Dans l'article ci-dessous, WebTech360 vous présente quelques méthodes pour détecter les erreurs de RAM à l'aide d'un logiciel sous Windows.
Refrigerators are familiar appliances in families. Refrigerators usually have 2 compartments, the cool compartment is spacious and has a light that automatically turns on every time the user opens it, while the freezer compartment is narrow and has no light.
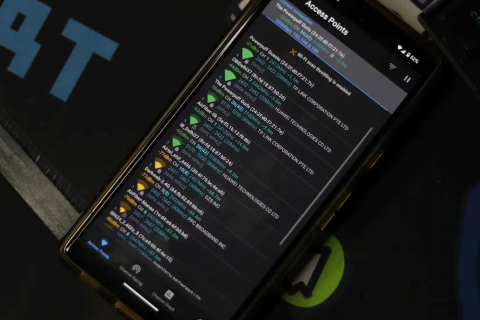
Wi-Fi networks are affected by many factors beyond routers, bandwidth, and interference, but there are some smart ways to boost your network.
Si vous souhaitez revenir à la version stable d'iOS 16 sur votre téléphone, voici le guide de base pour désinstaller iOS 17 et rétrograder d'iOS 17 à 16.
Le yaourt est un aliment merveilleux. Est-il bon de manger du yaourt tous les jours ? Si vous mangez du yaourt tous les jours, comment votre corps va-t-il changer ? Découvrons-le ensemble !
Cet article présente les types de riz les plus nutritifs et comment maximiser les bienfaits pour la santé du riz que vous choisissez.
Établir un horaire de sommeil et une routine de coucher, changer votre réveil et ajuster votre alimentation sont quelques-unes des mesures qui peuvent vous aider à mieux dormir et à vous réveiller à l’heure le matin.
Get Bathroom Tower Defense Roblox game codes and redeem them for exciting rewards. They will help you upgrade or unlock towers with higher damage.


