Windows Update automatically runs to check if your computer needs any updates. If so, it downloads the updates to a folder in preparation for installation. However, the Windows update files in the folder are not automatically deleted after installation. Therefore, you will need to delete them manually as described below.
1. Remove Windows 11 update via Settings
Step 1:
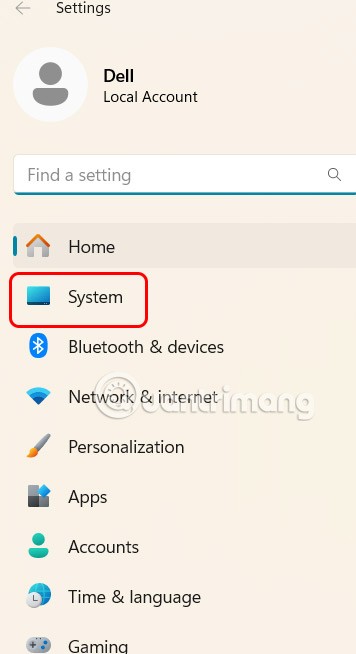
First, press the Windows + I key combination, then click System on the left side of the interface.
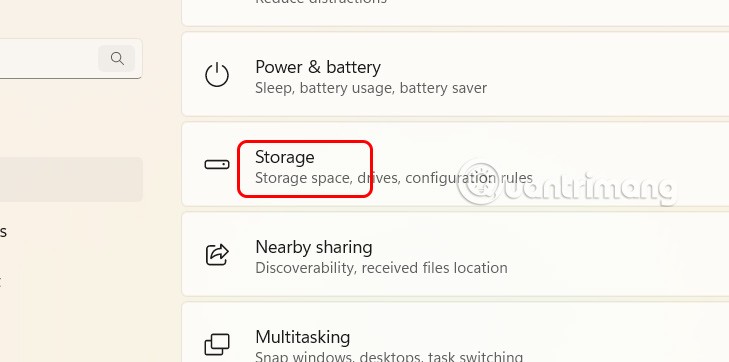
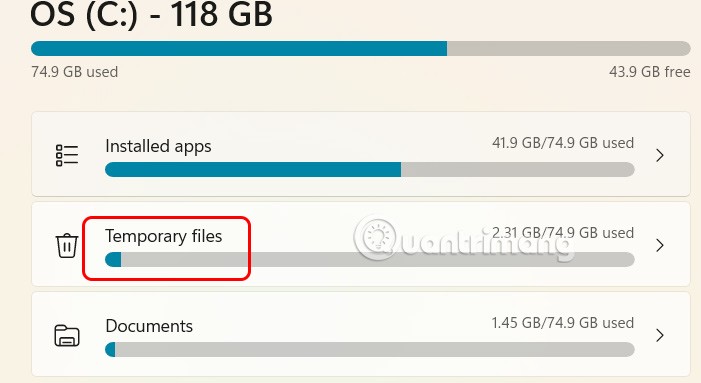
Looking at the interface next to us, click on Storage .
Step 2:
Here, users will see the interface for managing computer capacity by item, click on Temporary Files .
Step 3:
Now you select Windows Update Cleanup and click Remove files to delete update files on Windows 11.
Delete Windows 11 update files via Disk Cleanup
Step 1:
Press Win + S key combination then type Disk Cleanup in the search bar and click on the search result.
Step 2:
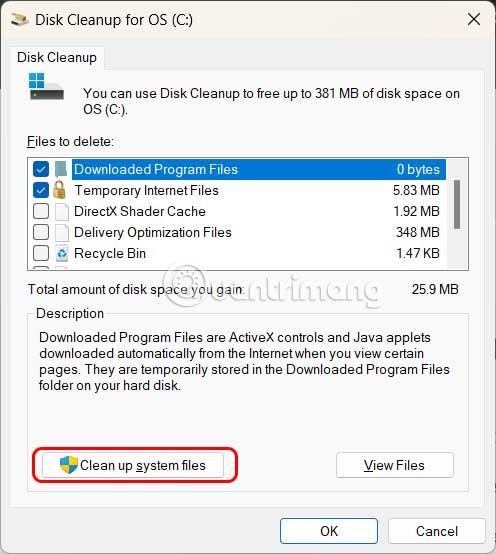
Next, click on drive C, which is usually the Windows installation drive, then click on Clean up System file s at the bottom of the interface.
Step 3:
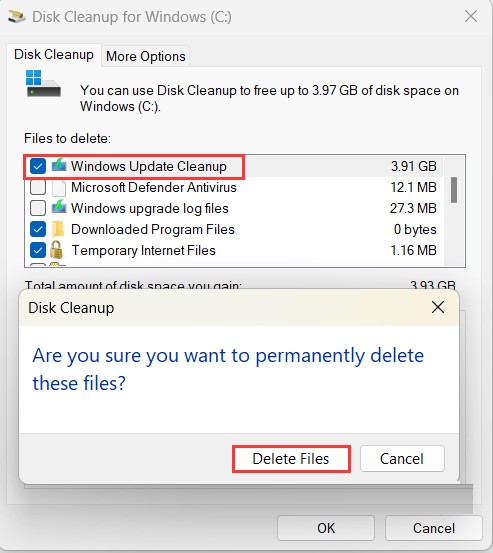
The new interface appears, click on Windows Update Cleanup and then click Delete to delete.
Remove Windows 11 updates via SoftwareDistribution
Windows Update saves downloaded files in a folder called SoftwareDistribution in the Windows folder. In some cases, to delete Windows update files, users need to delete the contents of this folder.
Step 1:
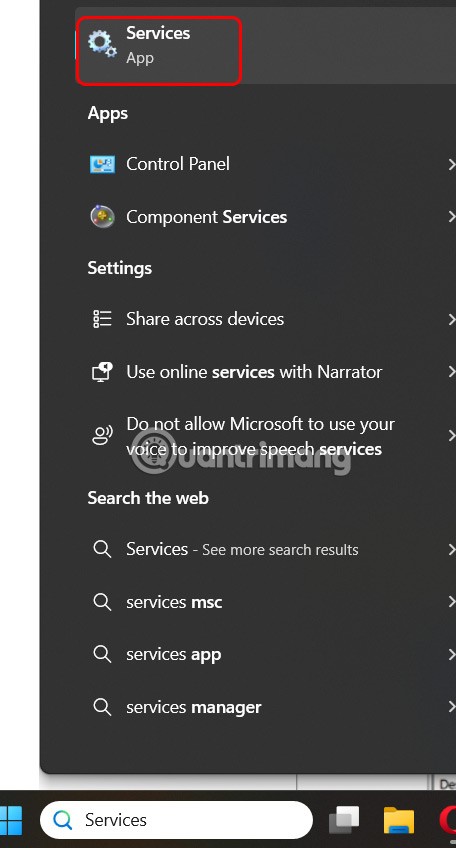
Press Win + S to open the search window and type Services to open.
Step 2:
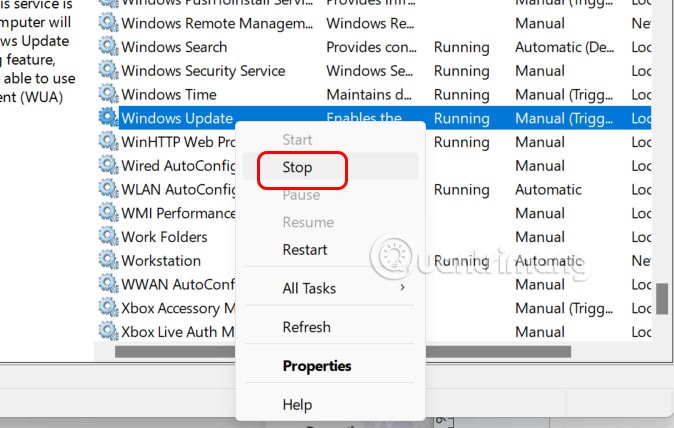
Display the new interface, find the Windows Update service , right-click and select Stop .
Step 3:
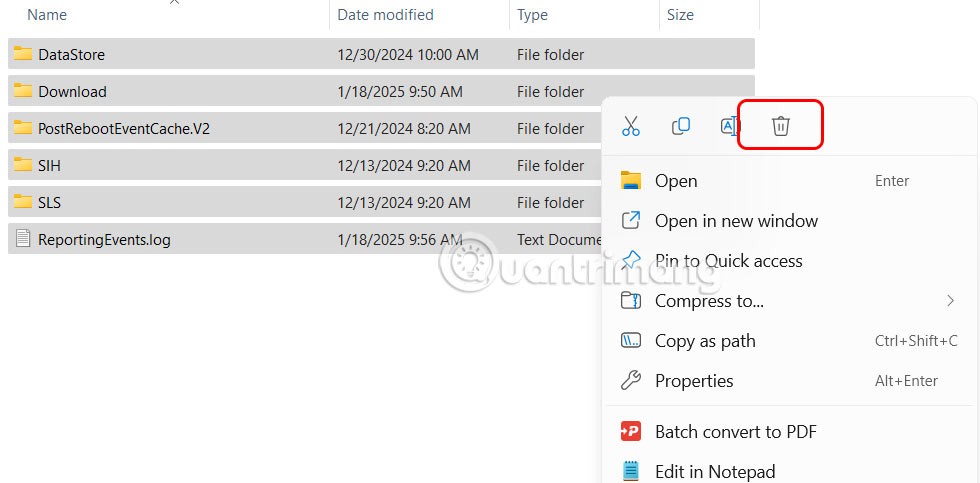
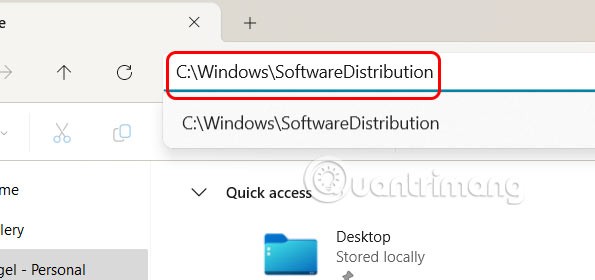
Open File Explorer and find the SoftwareDistribution folder in this path: C:\Windows\SoftwareDistribution .
Here you need to select all folders and right-click and select Delete to delete. Then go back to the Services window and turn on the Windows Update service , right-click on it and select the Start option.
